Master Track Routing
We mentioned earlier that the default output assignment of all tracks is Master (see Track I/O Settings). This is referring to the name of the project's master track, which defaults to Master. If we rename the master track, the output choosers will follow suit.
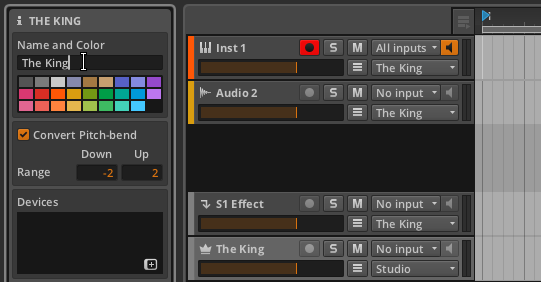 |
As you can also see in the image above, the default output of the master track is set to Studio, which refers to the output set in the Output Monitoring Panel. We will now examine this panel and then see an example setup where a multichannel audio interface is used.
Output Monitoring Panel
Clicking the Output Monitoring Panel view toggle (the speaker icon) in the window footer will call up the panel.
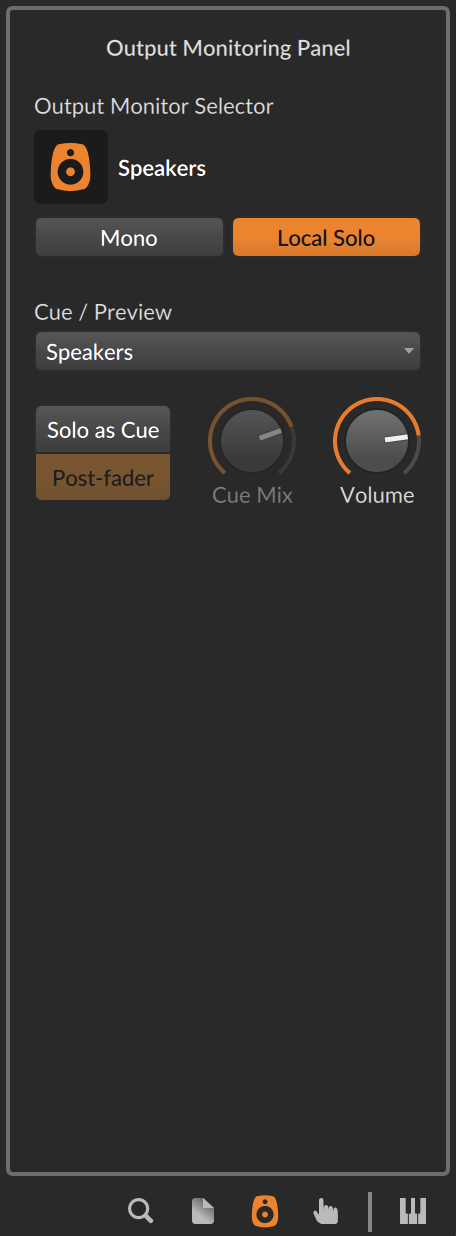
The top area of the panel displays the following audio settings:
The Output Monitor Selector lets you select which pair of speakers and/or sets of headphones are being used for any track whose output is set to Studio.
The monitoring options are those you have defined under Settings > Audio in the Dashboard (see Audio Settings) using the same interface.
To toggle a monitor: click the monitor's icon.
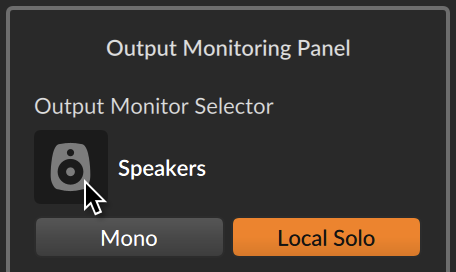
Only one pair of speakers can be active at a time, and any number of headphones may be used.
A fuller example with multiple monitoring options is presented in the next section.
The Mono button toggles your studio output(s) from stereo to a mixed-down mono output.
The Local Solo button applies when working with container devices that have discrete layers that include their own solo buttons, such as Drum Machine. When this function is enabled, solo logic is applied at the local device level. In this case, soloing one instrument layer/chains only mutes that device's other layers. This is the default behavior.
When this function is disabled, solo logic is applied at the global level. In this case, soloing one chain of a Drum Machine would effectively mute all other tracks in your project.
The middle area of the panel displays the following cue and preview settings:
The Cue / Preview output menu sets the monitoring destination for both cue signals (when the Solo as Cue button is active) and Browser Panel previews.
This is particularly useful for performance situations. For example, this allows you to cue up certain signals in your headphones before adding them to the main mix.
The Solo as Cue button alters how solo works. When this function is enabled, all solo-enabled tracks are also routed to the cue output, and all other tracks are routed as usual. Solo buttons themselves will be switched from S to C to reflect this.
When this function is disabled, normal solo rules apply (see Track Headers). When enabled, two additional parameters available:
The Post-Fader toggle applies each track's volume level before routing the signal to the set cue path.
The Cue Mix control is a crossfader, blending between the output Studio buss output on the left and the cue signals on the right. This allows you to set a mix of the two on your cue monitor.
The Cue Level controls sets the volume out for cue monitoring. As this buss is also used for previews in the browser panels, it is relevant even when the same audio path (say, headphones) is used for both your Studio and Cue / Preview outputs.
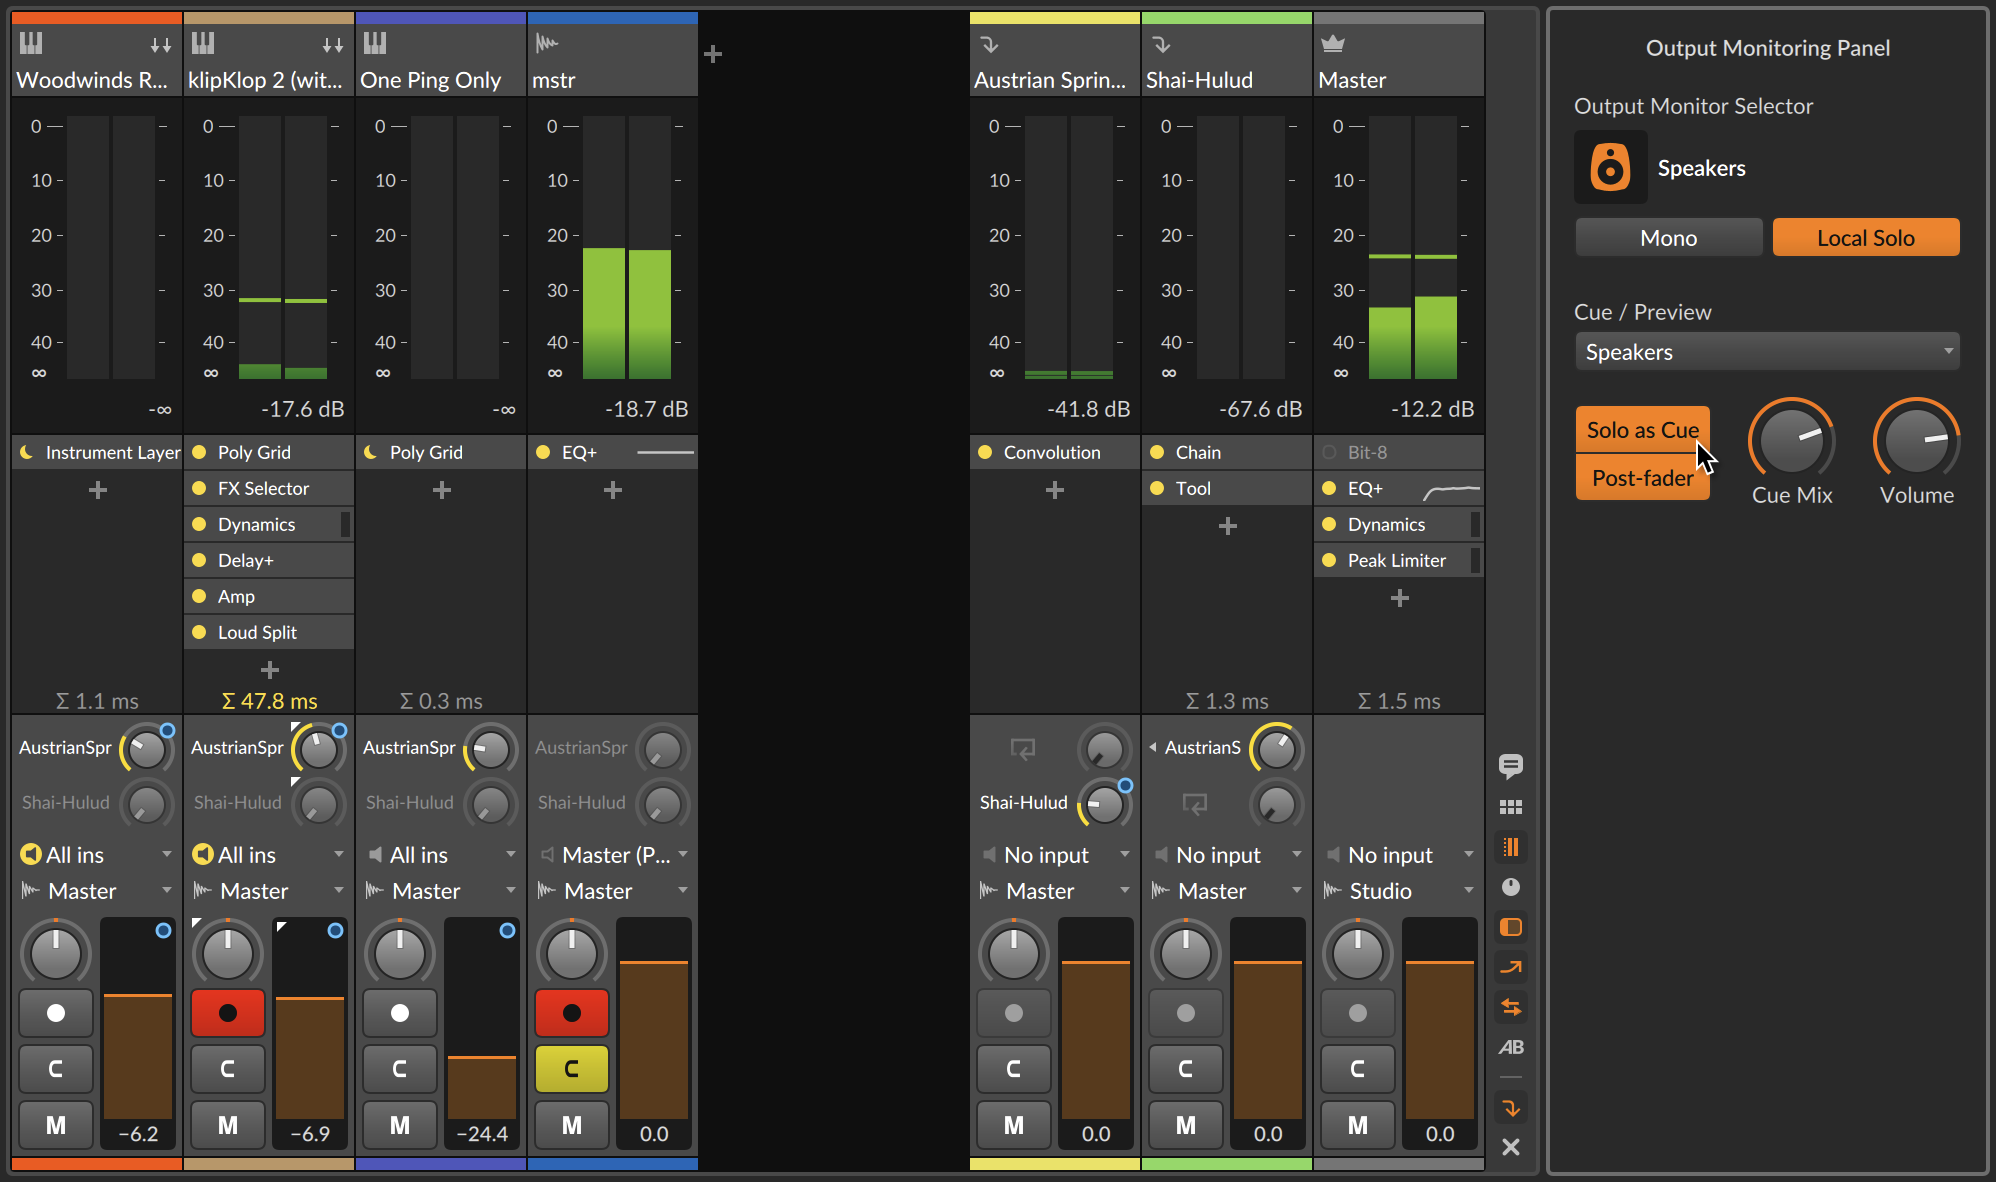
Multichannel Audio Interface
Most audio settings in the Output Monitoring Panel are only useful when you have more than one audio output option. To show one use case, I have connected a multichannel audio interface and made the following configuration in the Audio tab of the Preferences window.
 |
Let's walk thru the example shown above.
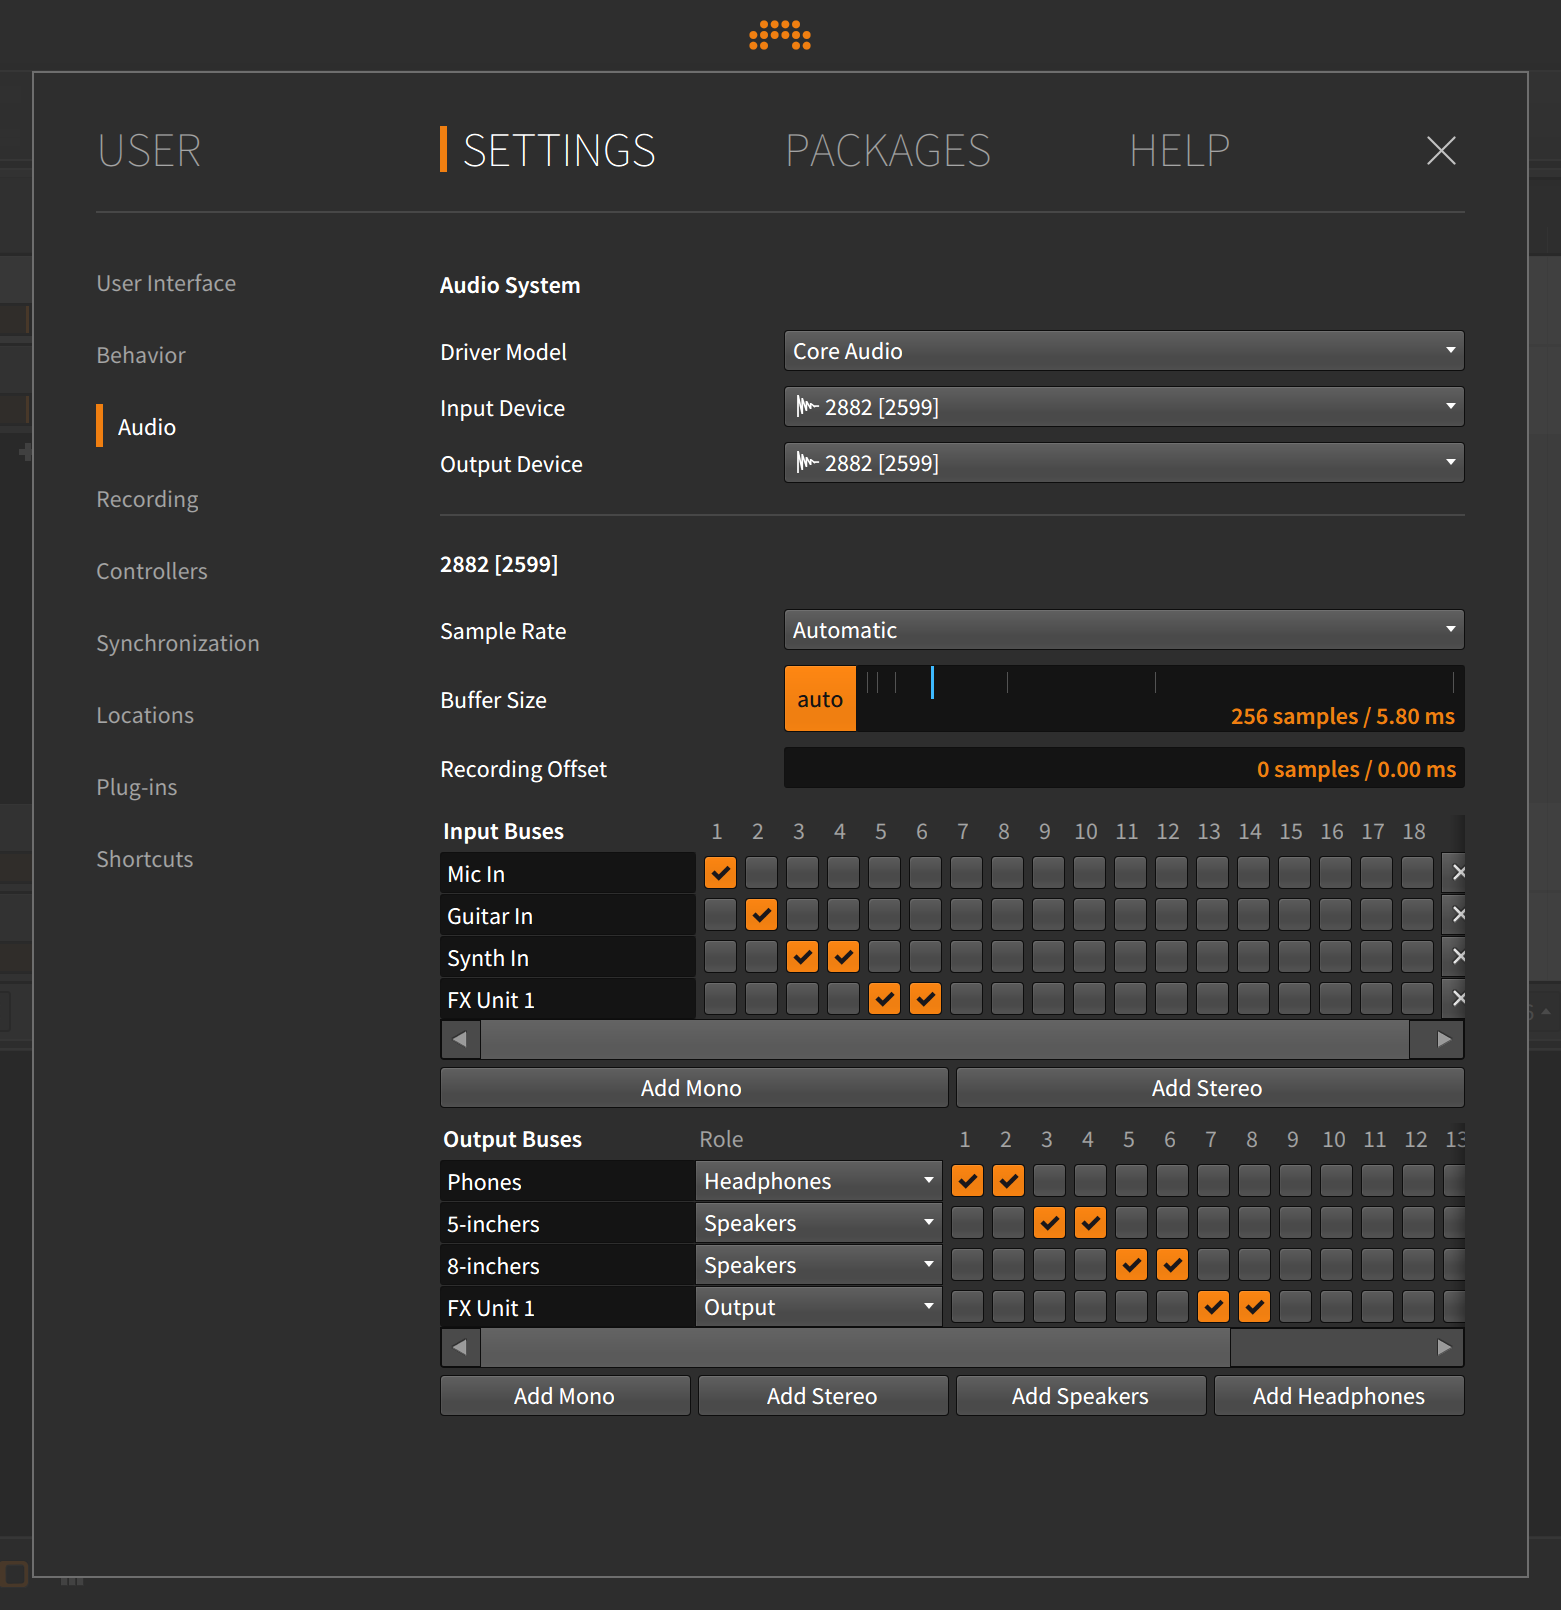
Under Audio Inputs, three paths have been set up:
Mic Inis a mono input path that uses input 1 of our audio interface.Guitar Inis a mono input path that uses input 2.Synth Inis a stereo input path that uses inputs 3 and 4.FX Unit 1is a stereo input path (for a hardware effects unit) that uses inputs 5 and 6.
Under Audio Outputs, four paths have been set up:
Phonesis a stereo output path that uses outputs 1 and 2 of our audio interface. This path has a role of Headphones.5-inchersis a stereo output path (for my 5" speakers) that uses outputs 3 and 4. This path has a role of Speakers.8-inchersis a stereo output path (for my 8" speakers) that uses outputs 5 and 6. This path has a role of Speakers.FX Unit 1is a stereo output path (for a hardware effects unit) that uses outputs 7 and 8. This path has a role of Output.
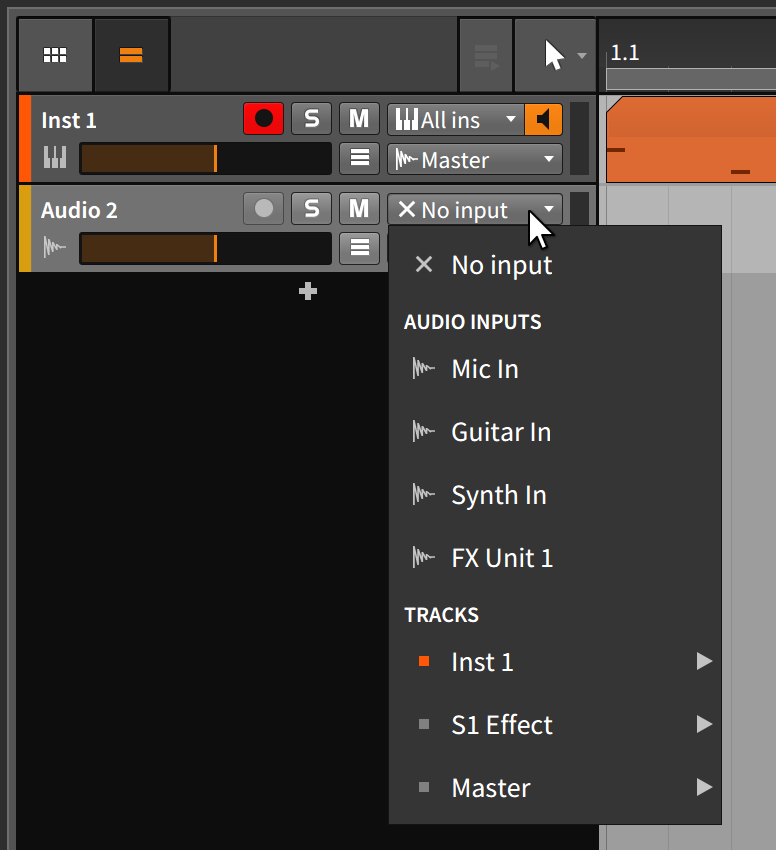
The audio input paths will now be available in various places in the program, such as audio tracks' input choosers.
 |
The audio output paths will be available from every track's output chooser, but they will also appear in the Output Monitoring Panel.
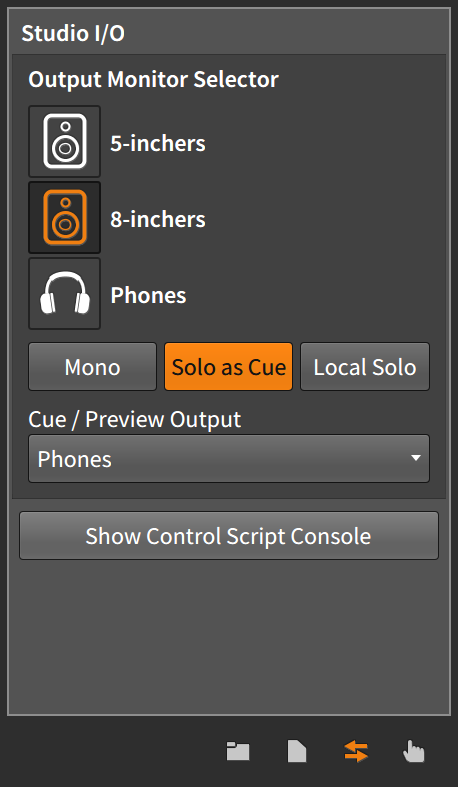 |
You will notice that only the monitoring options (Speakers and Headphones) are available here. Setting a path to an Output role makes it available for signal routing, but not for monitoring.
So in this example, my project's master track is routed to Studio. Because the Output Monitor Selector of the Output Monitoring Panel is set to 8-inchers, anything reaching the master track is getting passed to my 8-inch speakers. And because Solo as Cue is enabled, any track that is solo-enabled (and any Browser Panel content being previewed) is routed to Phones.
If you have a simple setup and never click any of these options, audio will be routed to the right place. But if you have more sophisticated requirements, the settings shown here and Bitwig Studio's routing options will cater to your needs as well.
- 0. Welcome to Bitwig Studio
- 1. Bitwig Studio Concepts
- 2. Anatomy of the Bitwig Studio Window
- 3. The Arrange View and Tracks
- 4. Browsers in Bitwig Studio
- 5. Arranger Clips
- 6. The Clip Launcher
- 7. The Mix View
- 8. Introduction to Devices
- 9. Automation
- 10. Working with Audio Events
- 11. Working with Note Events
- 12. Operators, for Animating Musical Sequences
- 13. Going Between Notes and Audio
- 14. Working with Projects and Exporting
- 15. MIDI Controllers
- 16. Modulators, Device Nesting, and More
- 17. Welcome to The Grid
- 18. Working on a Tablet Computer
- 19. Device Descriptions
- 19. Credits