2. Anatomy of the Bitwig Studio Window
All functions and controls of Bitwig Studio are accessible thru the application window. Each window can be thought of in four vertical slices: the header, the menus/transport area, the body, and the footer.
 |
We will give them each their own turn: the reliable header, the pliant footer, the shifting menus/transport area, and finally the mercurial body.
| Note | |
|---|---|
When using the Tablet display profile, some of the elements listed in this chapter are rearranged. For details on using a tablet computer, see chapter 18: Working on a Tablet Computer. |
The Window Header
The header of each window contains two main sections: project tabs are found on the left, and window controls are found on the right.
 |
The area just to the left of the window controls is also used controller status icons, if controllers are connected and configured. Otherwise, nothing appears here.
In the center is the Dashboard button. When clicked, the Dashboard will appear over the main window. For more information on the Dashboard, see The Dashboard.
It is also worth noting that by right-clicking anywhere in the window header, a context menu with display options is called up.
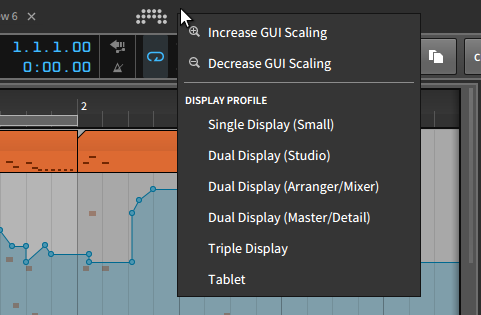 |
The and options allow you to resize Bitwig Studio's entire graphical user interface to be larger or smaller (respectively) on your monitor.
| Note | |
|---|---|
By default, Bitwig Studio makes maximum use of your screen. As such, the option may not do anything if you try it first. |
Beneath the GUI options are a list of the available Display Profile choices (see A Musical Swiss Army Knife) for easy switching.
Project Tabs Section
On the far left are tabs for the Bitwig Studio projects which are currently open. Some notes on using these tabs:
Bitwig Studio will display the contents of only one project at a time. This is true even if you are using a display profile that uses multiple application windows.
To focus on any one of the open projects, click on its tab.
The tab that is outlined with a box and whose name appears in bright white represents the currently viewed project. In the image below, this is the project named
2nd.
Only one project at a time is capable of producing sound. This allows you to view and even edit different projects without interrupting audio playback of the current one.
You can click and drag any project tab to change its position.
If there is not enough space to show all open projects together, left and right scroll arrows will appear around the project tabs.

An asterisk (*) will be appended to any project's name if unsaved changes have been made.
The x on the right side of each tab can be clicked to close that project.
Controller Status Section
When MIDI controllers are connected and configured, the area just before the window controls section is used to display one icon per controller (within reason).
 |
While the icons are suggestive of each device's layout — here showing one regular controller, and one pad-style controller — mousing over the icon will show the controller name.
 |
Clicking on the icon offers a status view for that controller.
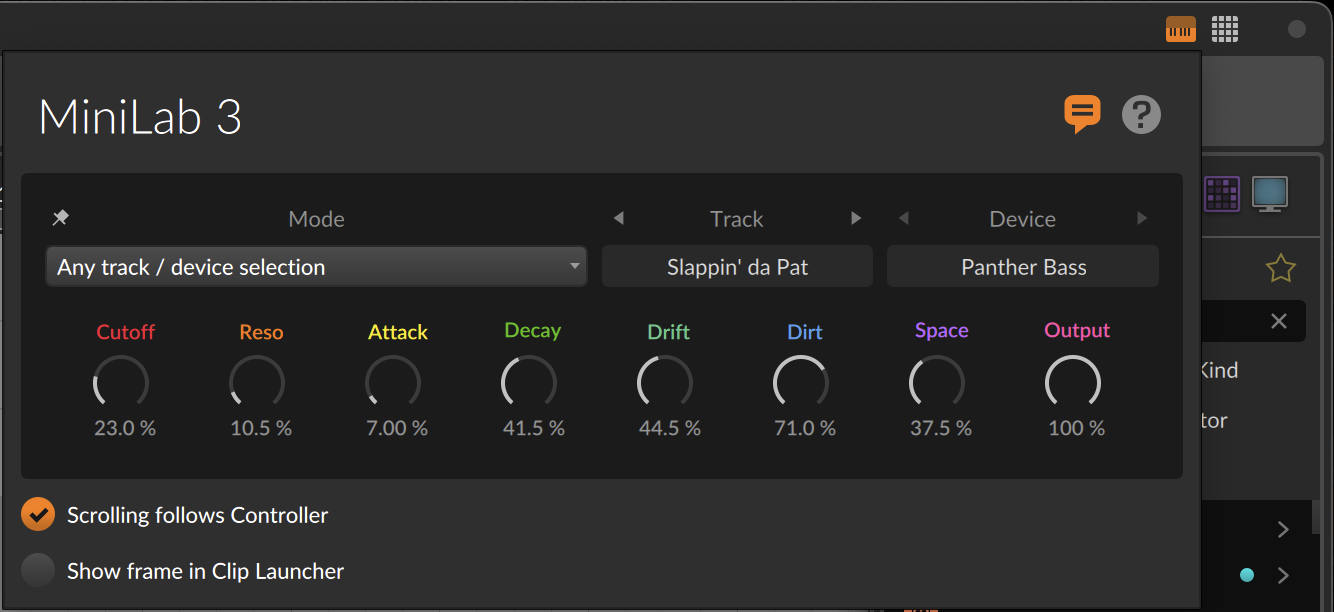 |
First, the icons at the top right and settings at the bottom are similar to what the Dashboard offers under Settings > Controllers (see Controllers Settings). The dark field in the middle offer some information and some control.
Informationally, we see exactly what this controller is currently looking at. In this case, a Device on a particular Track is being targeted, and the names and current values of the parameters in question are shown on the knobs.
Then there is this Mode menu, which determine what the controller will follow.
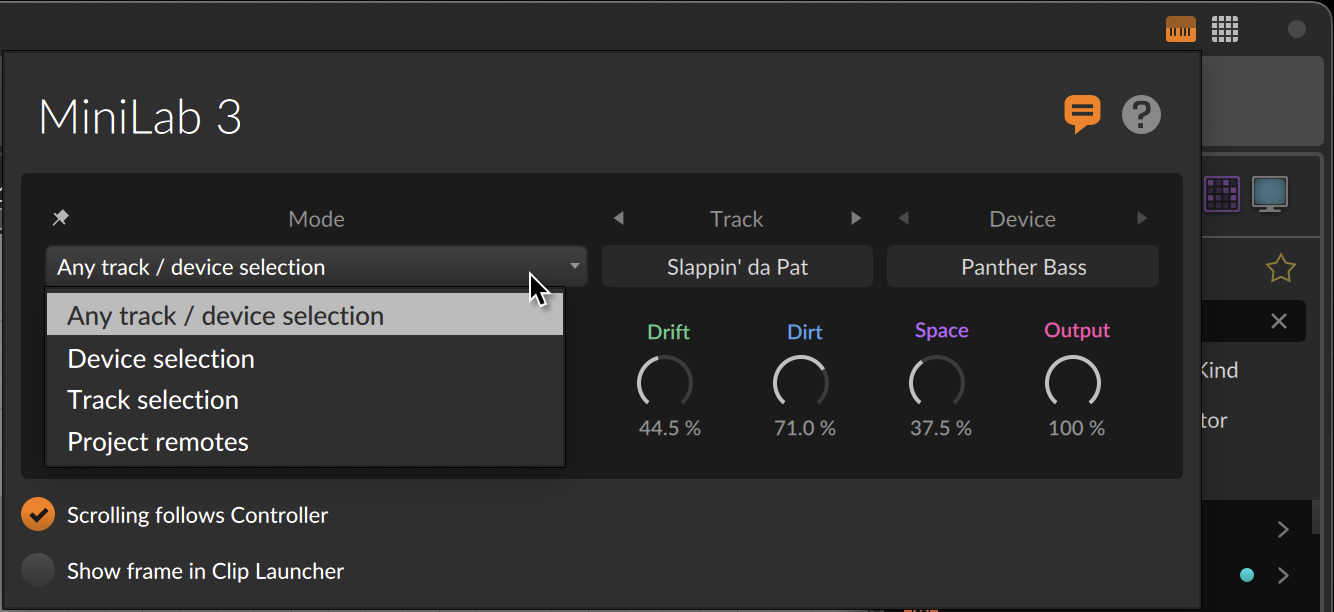 |
The Mode options include:
Any track / device selection(the default setting) will focus this controller on the remote controls of any element selected in the software, including devices, tracks, and project remotes (when selecting the master track).Device selectionwill follow the remotes of only devices that are selected.Track selectionwill follow the remotes of only tracks that are selected.Project remoteswill keep the controller focus on the project-level remote controls, regardless of what other project elements are clicked on.
This status page can also be used to navigate to other targets, by clicking the left and right stepper triangles around the Track and Device elements. And particular targets can also be "pinned" or locked so that they stay in focus.
Mousing over either the Track or Device element will hint at this option, showing a thumbtack icon while you hover.
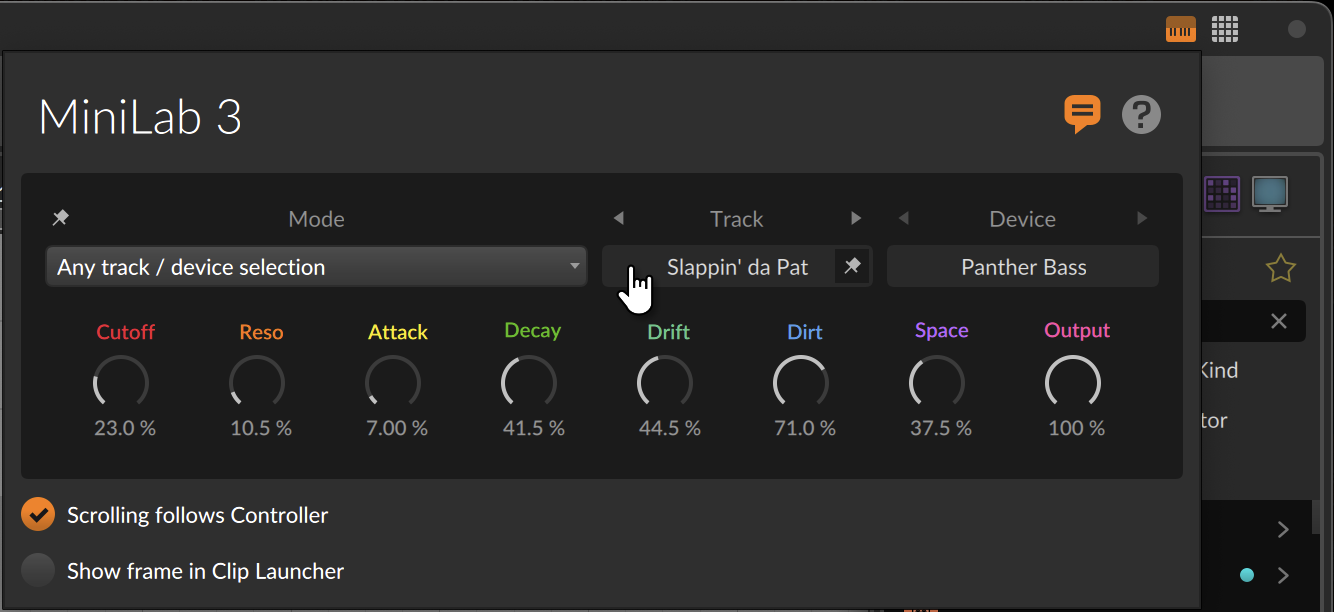 |
To pin a controller's focus on a particular track or device: simply click that track or device in the controller status pop-up.
 |
To unpin a device's focus from a particular track or device: either click the selected track or device again to toggle it off, or click to pin the controller to a different target.
Window Controls Section
| Note | |
|---|---|
If your operating system has a different standard for window controls, then we try to use their preferred layout. For example on macOS, the notification toggle (shown below) will be alone in the top right corner of the window, and OS-standard close (red), minimize (yellow), and maximize (green) buttons appear on the left. |
On the far right of the window header are options for controlling Bitwig Studio's window size, appearance, and notifications.
 |
Notification toggle allows you to show or hide event notifications from Bitwig Studio. The filled circle shown above represents that notifications are enabled, and an empty circle indicates that they will not pop up.

When notifications are enabled, any received message it will pop up below the window header.
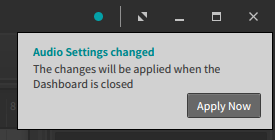
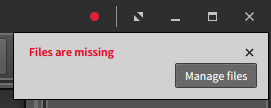
Most often, notifications are presented with an action button (such as Apply Now in the above image). Notifications tinted blue-ish are largely assistive. Notifications tinted red represent errors that could adversely impact the performance of your project or the program itself.
Finally, when a message is received but notifications are disabled from appearing, the ring of the empty circle icon is tinted based on the type of notification that has arrived.

Full screen button switches Bitwig Studio into the full-screen mode provided by your operating system. Once you are in full-screen mode, the options available in the window controls section may decrease.

To exit full-screen mode: click the window maximize toggle, to the immediate left of the window close button.
Window minimize button hides the Bitwig Studio window.
Window maximize toggle alternates between maximizing the size of the window and restoring its original, smaller size.
Window close button is the equivalent of quitting Bitwig Studio (by selecting > ).
- 0. Welcome to Bitwig Studio
- 1. Bitwig Studio Concepts
- 2. Anatomy of the Bitwig Studio Window
- 3. The Arrange View and Tracks
- 4. Browsers in Bitwig Studio
- 5. Arranger Clips
- 6. The Clip Launcher
- 7. The Mix View
- 8. Introduction to Devices
- 9. Automation
- 10. Working with Audio Events
- 11. Working with Note Events
- 12. Operators, for Animating Musical Sequences
- 13. Going Between Notes and Audio
- 14. Working with Projects and Exporting
- 15. MIDI Controllers
- 16. Modulators, Device Nesting, and More
- 17. Welcome to The Grid
- 18. Working on a Tablet Computer
- 19. Device Descriptions
- 19. Credits