Fades & Crossfades Tutorial
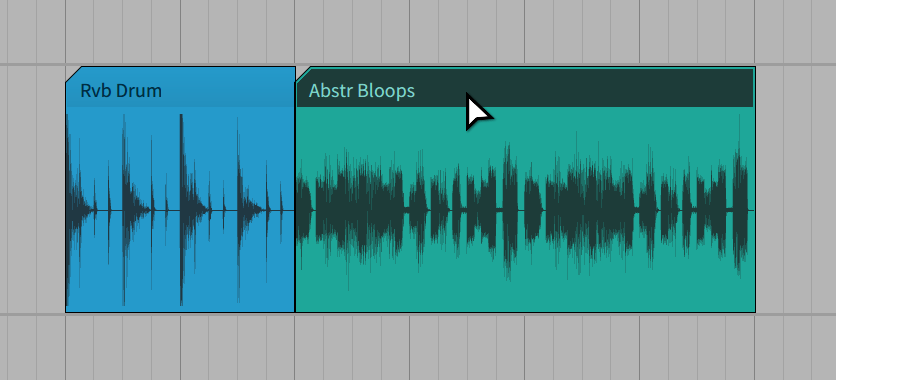
Volume fades and crossfades can be applied directly to any audio Clip in the Arranger panel.
Additionally, you can fade and crossfade individual Audio Events contained in a Clip.
Watch this video tutorial to learn how to master fades and crossfades in Bitwig Studio, or scroll down to walk through the tutorial step by step.
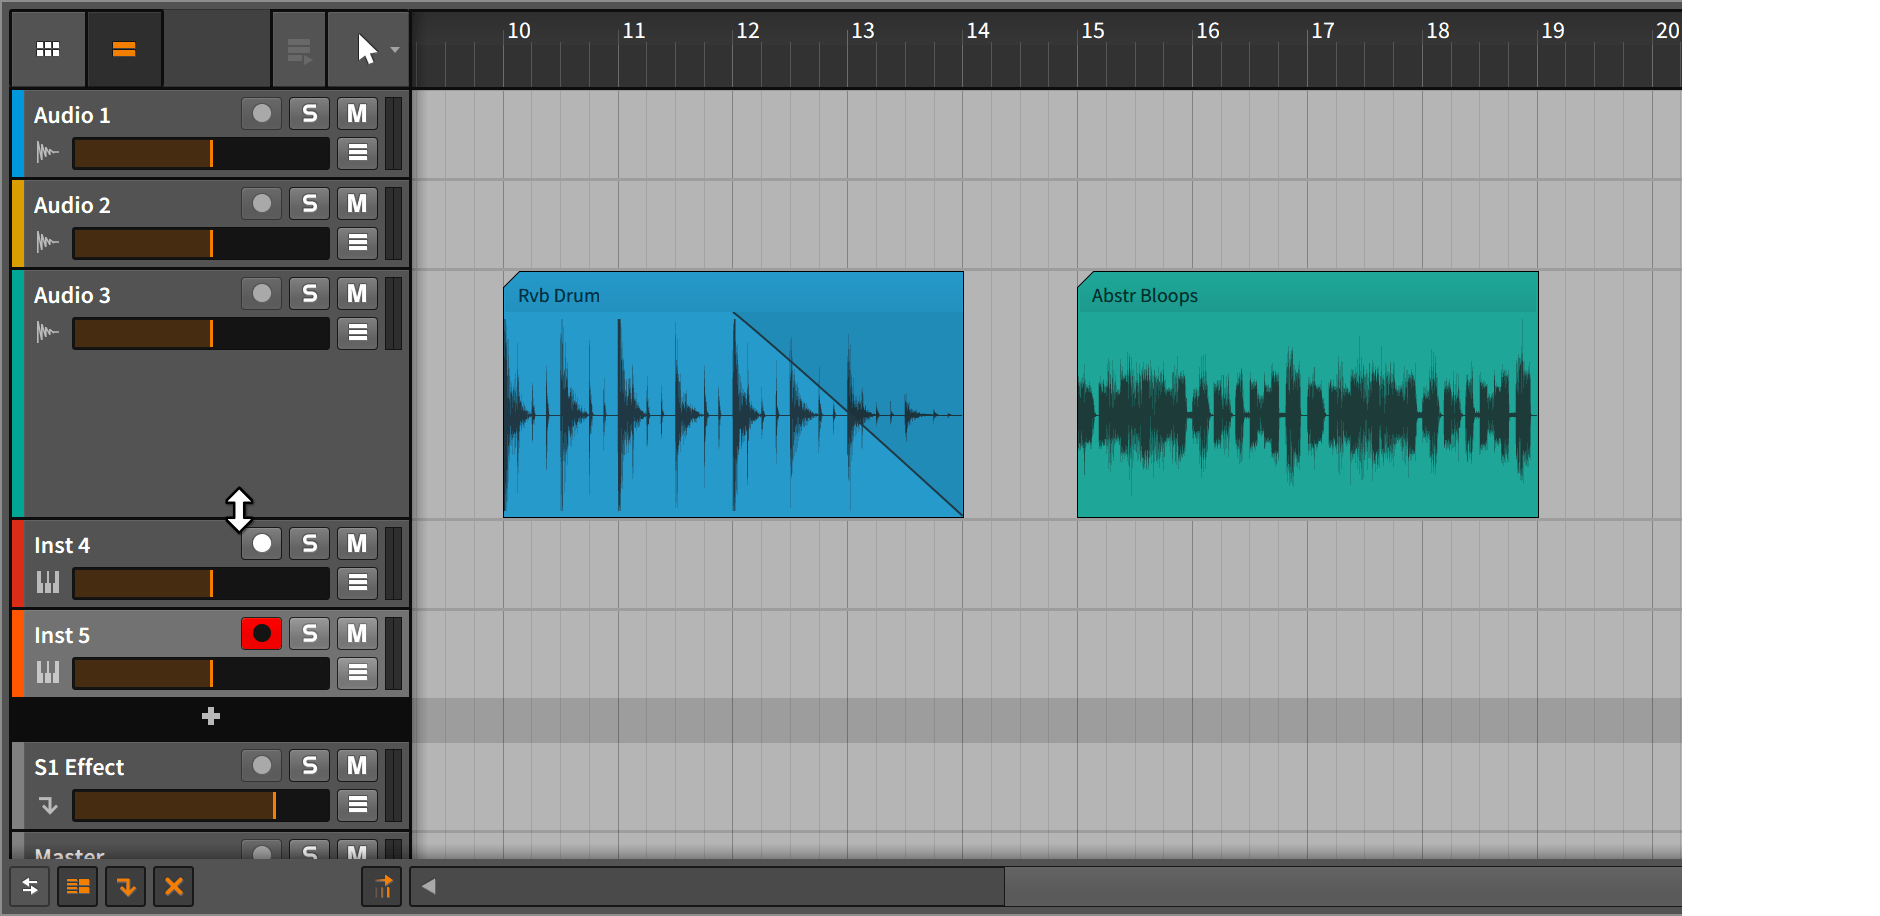
We start this step-by-step guide in the Arranger panel:
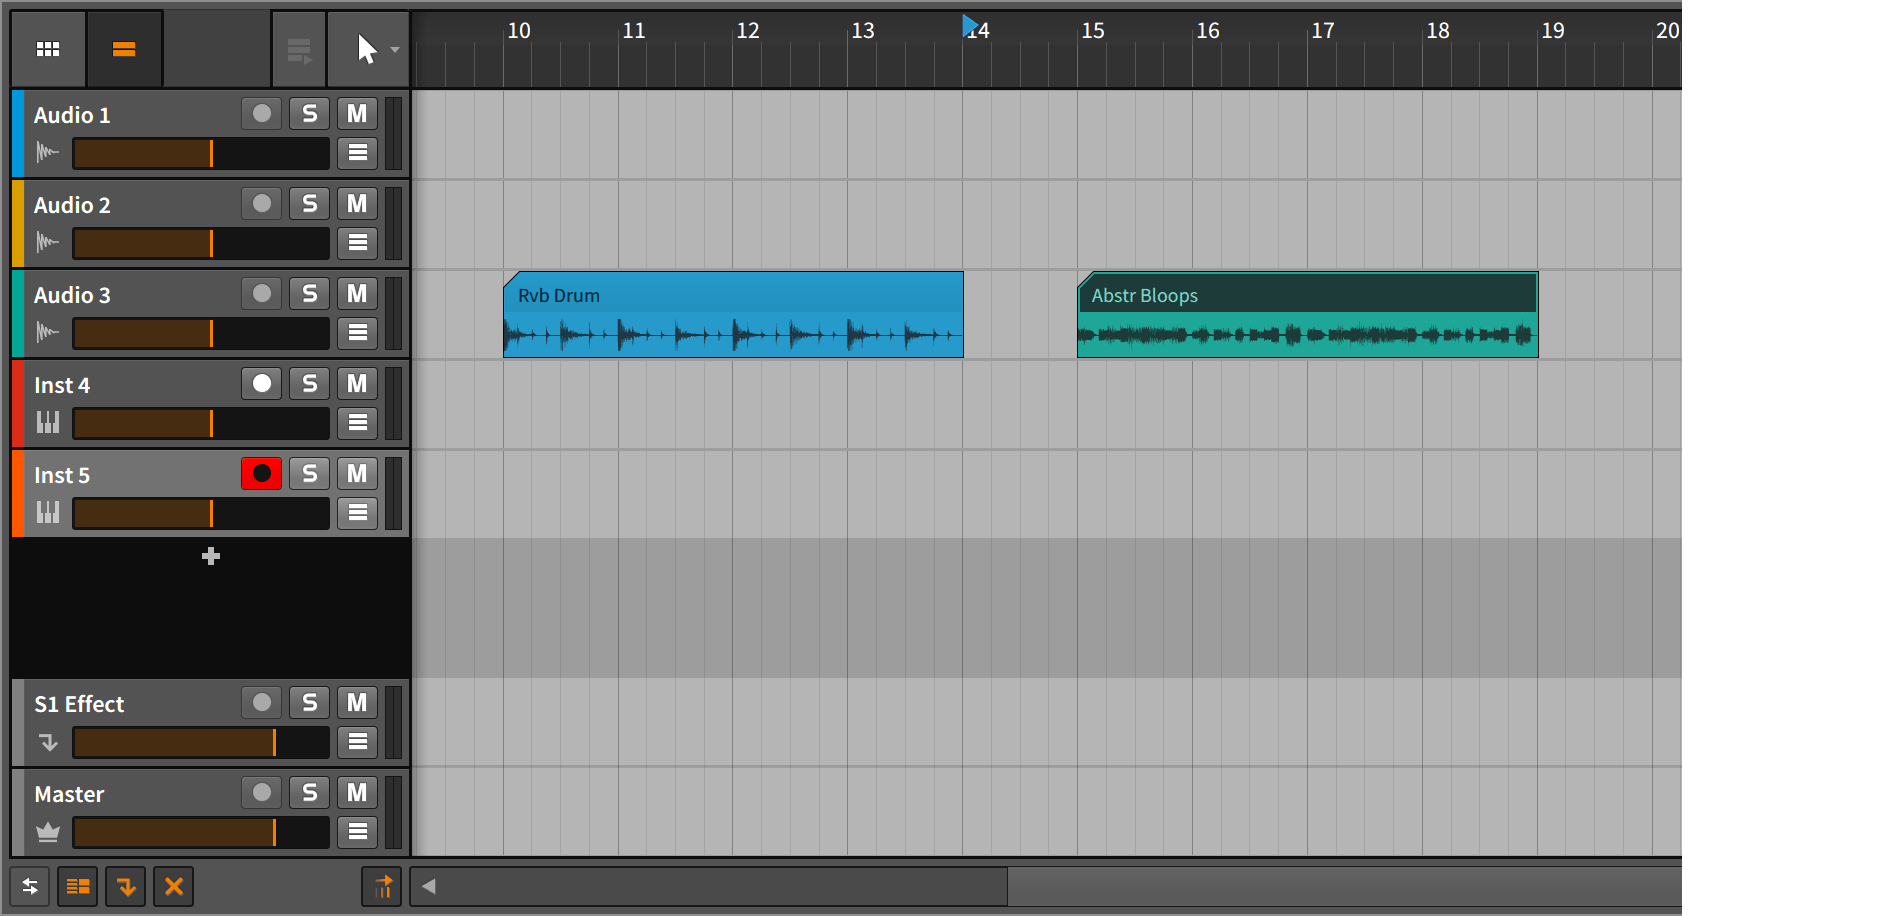
To apply a fade, locate the mouse cursor over the margin of an Audio Clip.
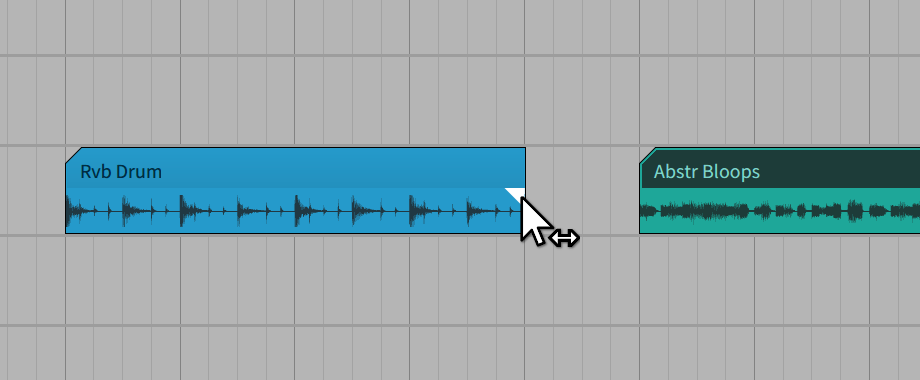
A white triangle appears at the Clip margin to indicate you are ready to apply a fade here.
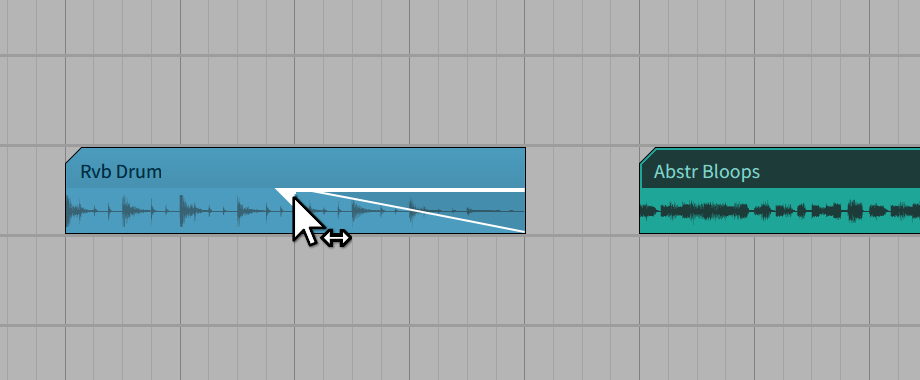
Now just click and drag to apply the fade.
TIP! Hold the SHIFT key while dragging to temporarily override any snapping.
The fade is now visible, and the change in volume is also represented in the waveform display.
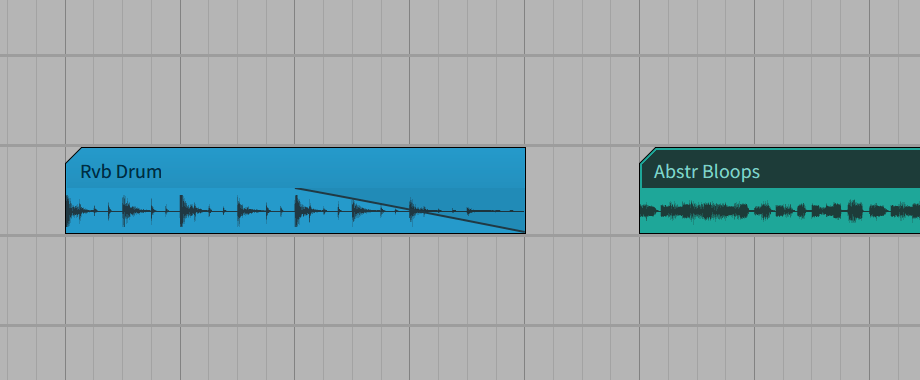
TIP! Click and drag the bottom of a track header to expand the track height.
This increases the vertical zoom level of Clips and allows more detailed editing of the fade:

To turn the linear fade into a curve, just click and drag the fade slope.
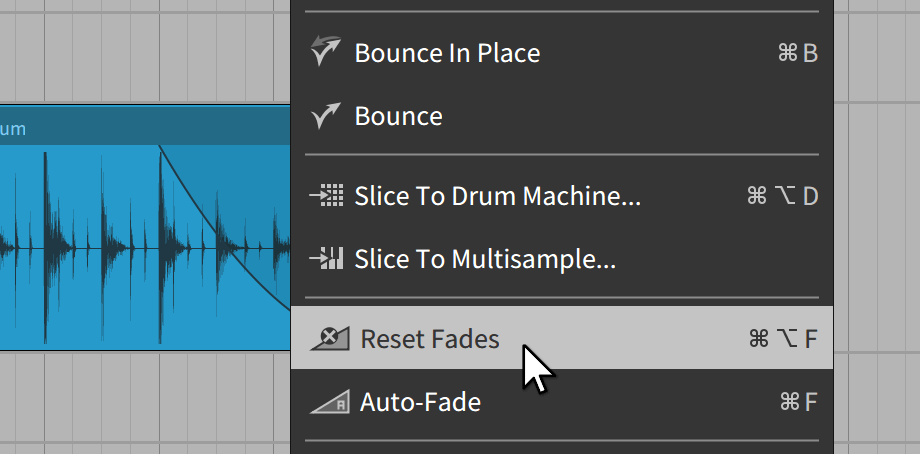
TIP! To reset a fade, right-click on the Clip header and select “Reset Fades” from the contextual menu.
The “Auto-Fade” option underneath it applies a very short fade at both clip ends, to eliminate possible clicks. Both options are also available in the “Clip” menu, which shows up when a Clip is selected.
Crossfades
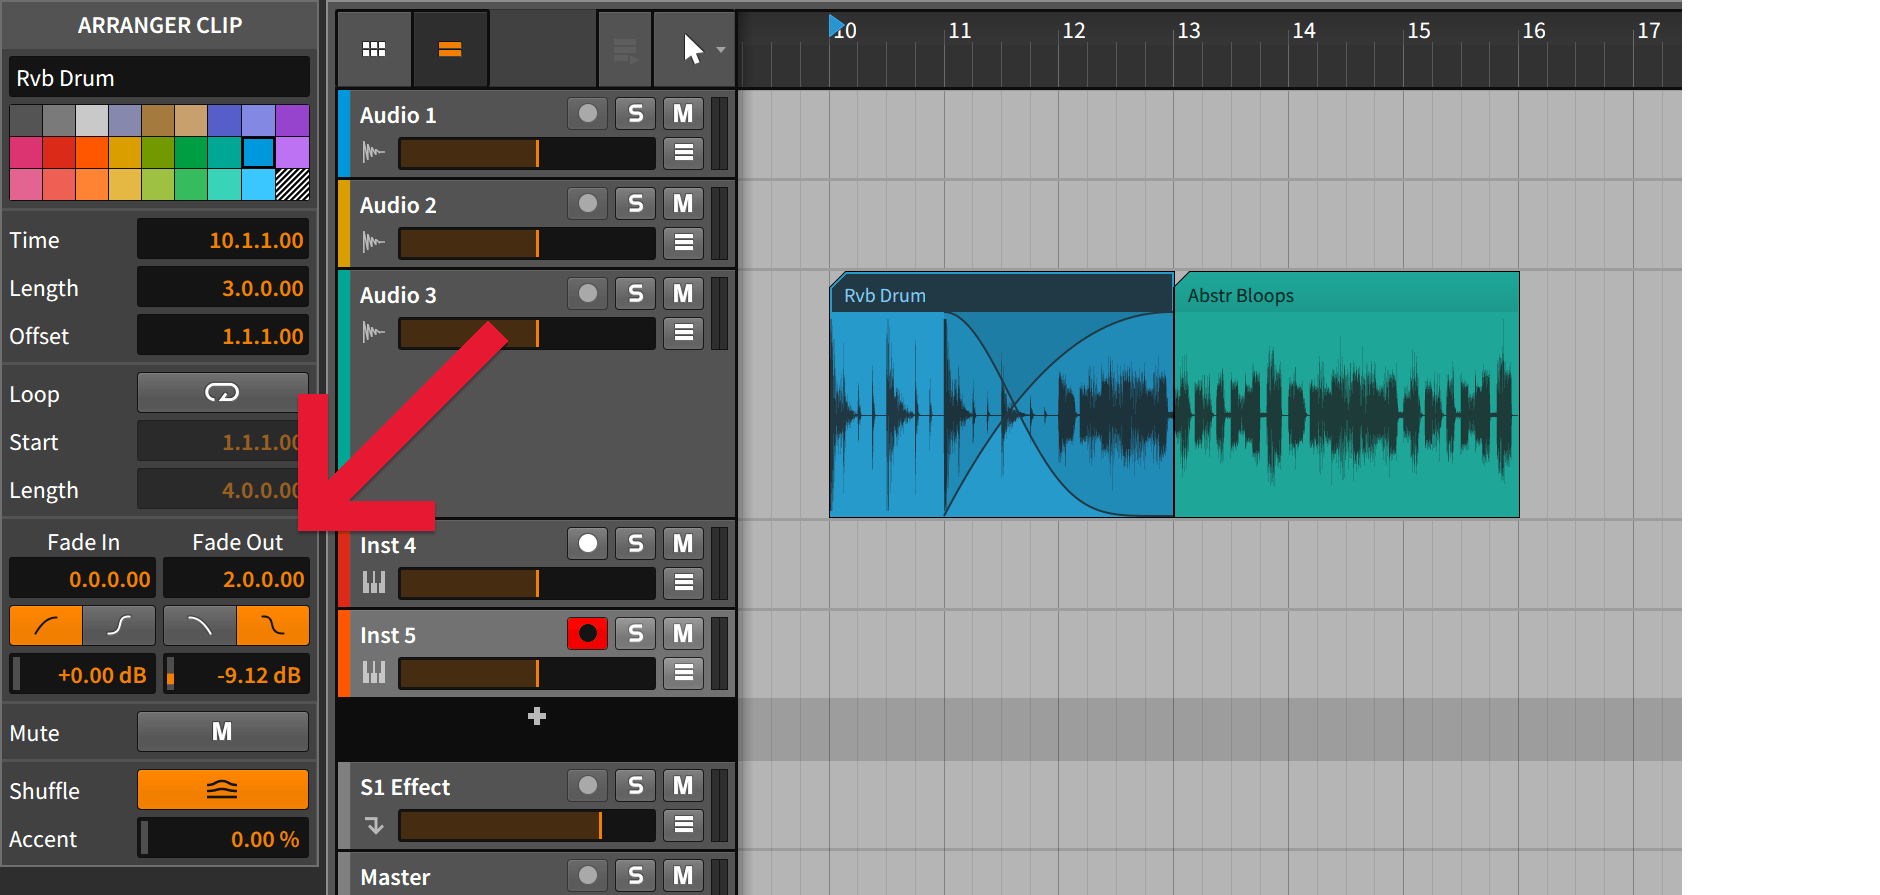
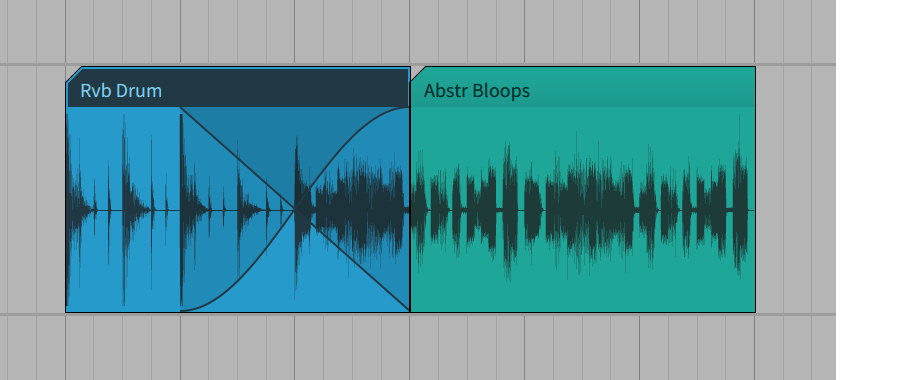
A crossfade can be applied between two neighboring Audio Clips that don’t have any space between them.
Naturally, a crossfade only makes sense if at least one of the neighboring clips is not at its full length or is set to Loop mode: some hidden audio material is required in the direction you would like to apply the crossfade to, so this part can blend (crossfade) into the second Clip.
To prepare an example for crossfading, we'll drag the green Clip to the left, to cover half of the blue Clip. The blue Clip is now cropped to half of its length, but it still contains audio beyond its end.
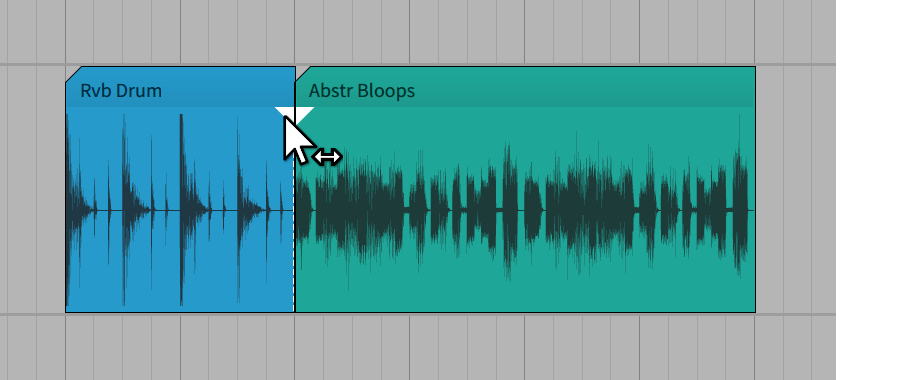
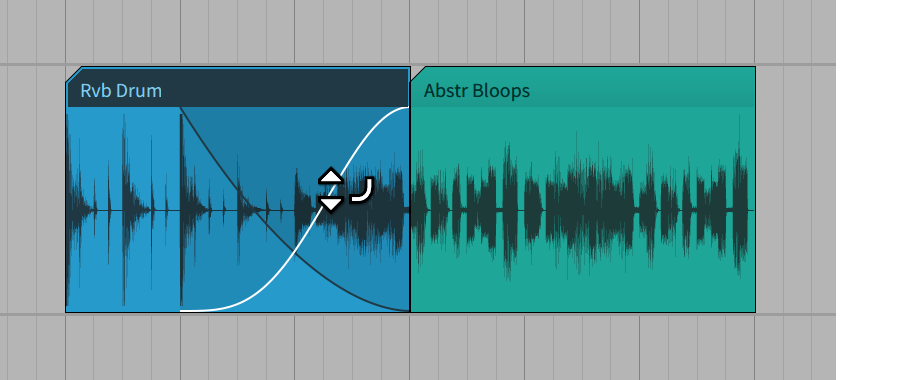
There are now two of the white, triangular fade handles at the top, indicating that a crossfade can now be pulled simultaneously in both directions.
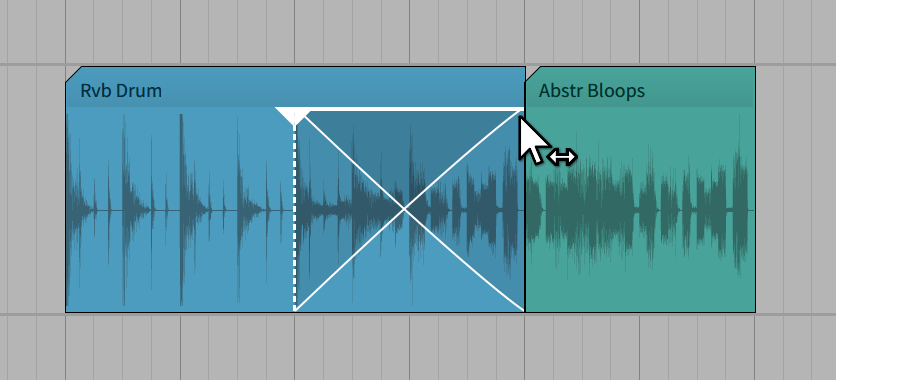
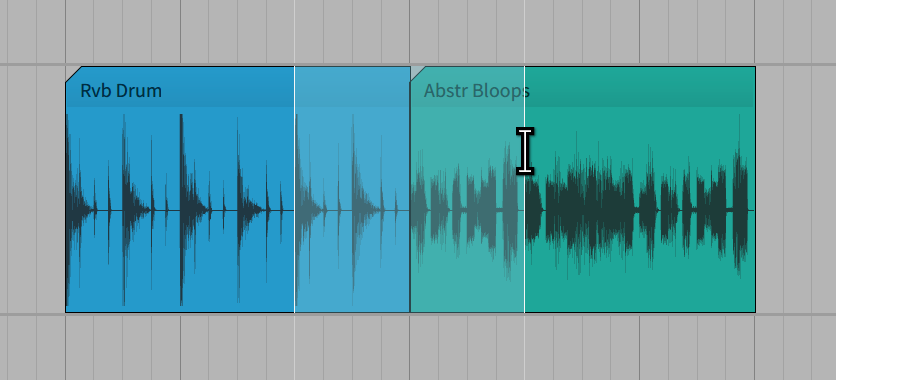
As you click and drag one of the handles toward the neighboring clip, a crossfade is applied.
Click and drag the intersection of the crossfade in order to curve both fades simultaneously.
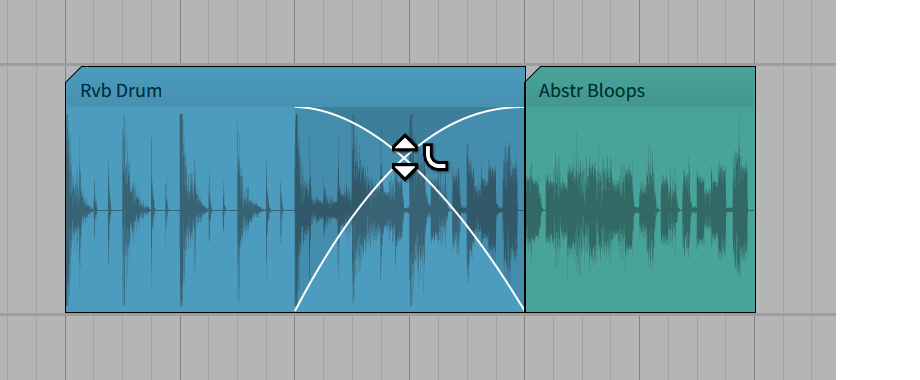
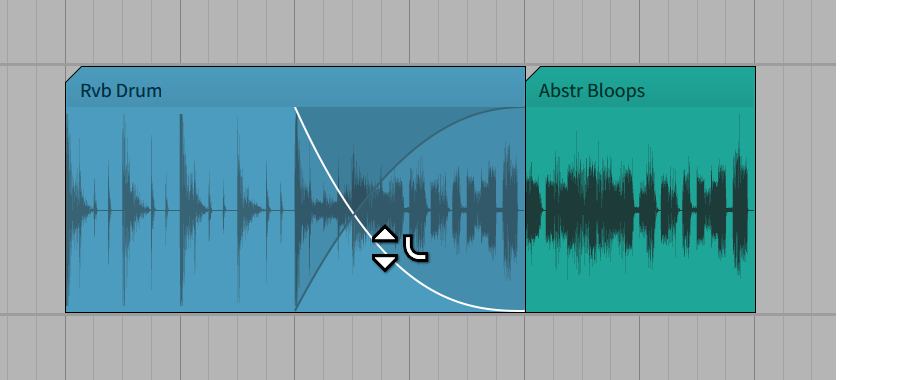
Also within a crossfade, both fades can be curved individually. Depending on the mouse cursor position, one or both curves will highlight to indicate which fade you are about to edit.
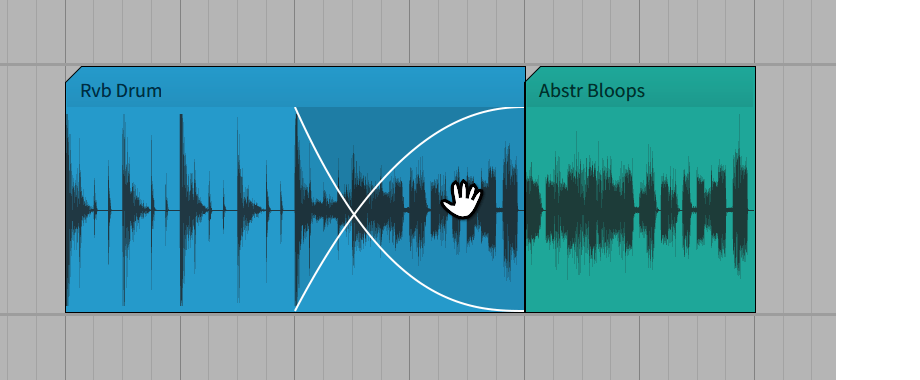
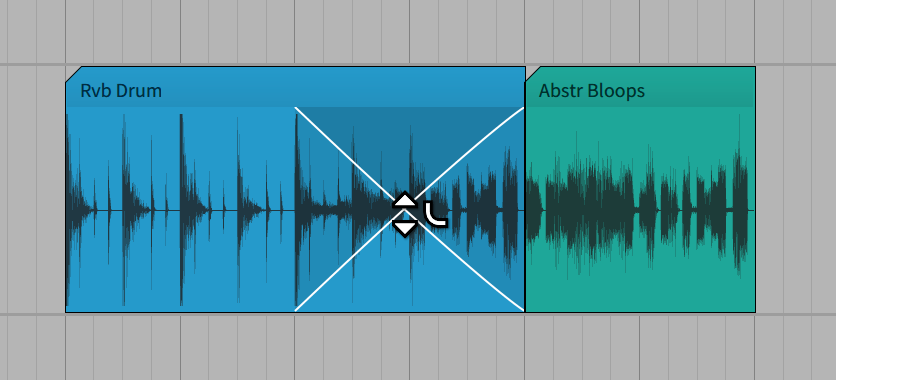
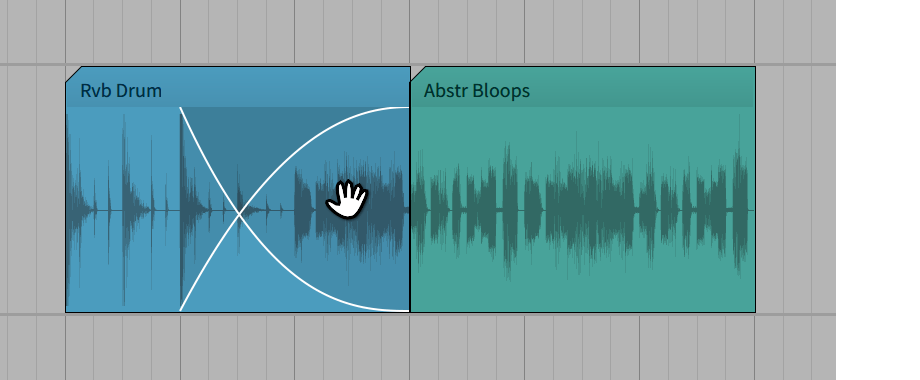
When hovering over a crossfade, but not touching one of the curves, the "move" hand will appear, which lets you move the crossfade horizontally, while keeping both of the Clips in place.
Audio Event Fades
An Audio Clip in Bitwig Studio is not limited to representing just one Audio file. In fact, an Audio Clip is a container, in which you can freely combine and edit multiple pieces of Audio (Audio Events). Consequently, fades and crossfades are also available at the level of Audio Events.
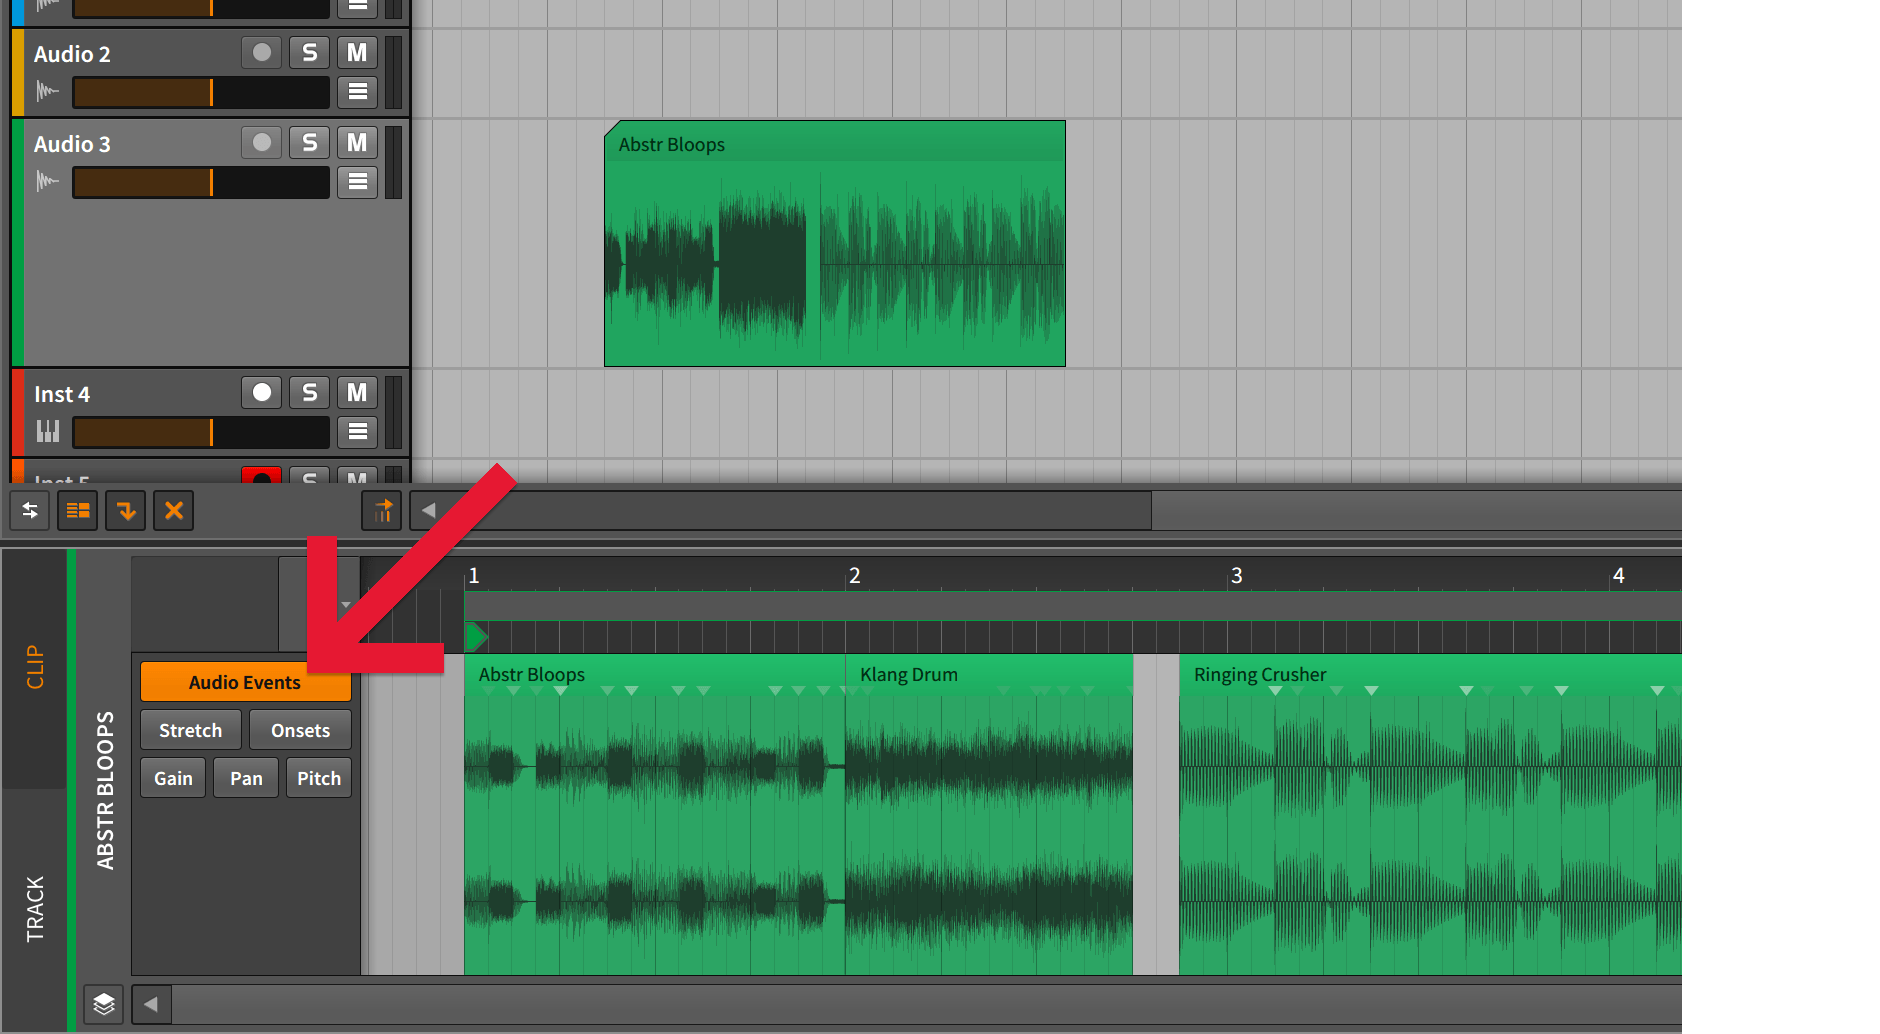
Double-click on an Audio Clip to show it in the Edit panel. Both the Clip- and Track-editing modes provide access to the contained Audio Events of the selected Clip.
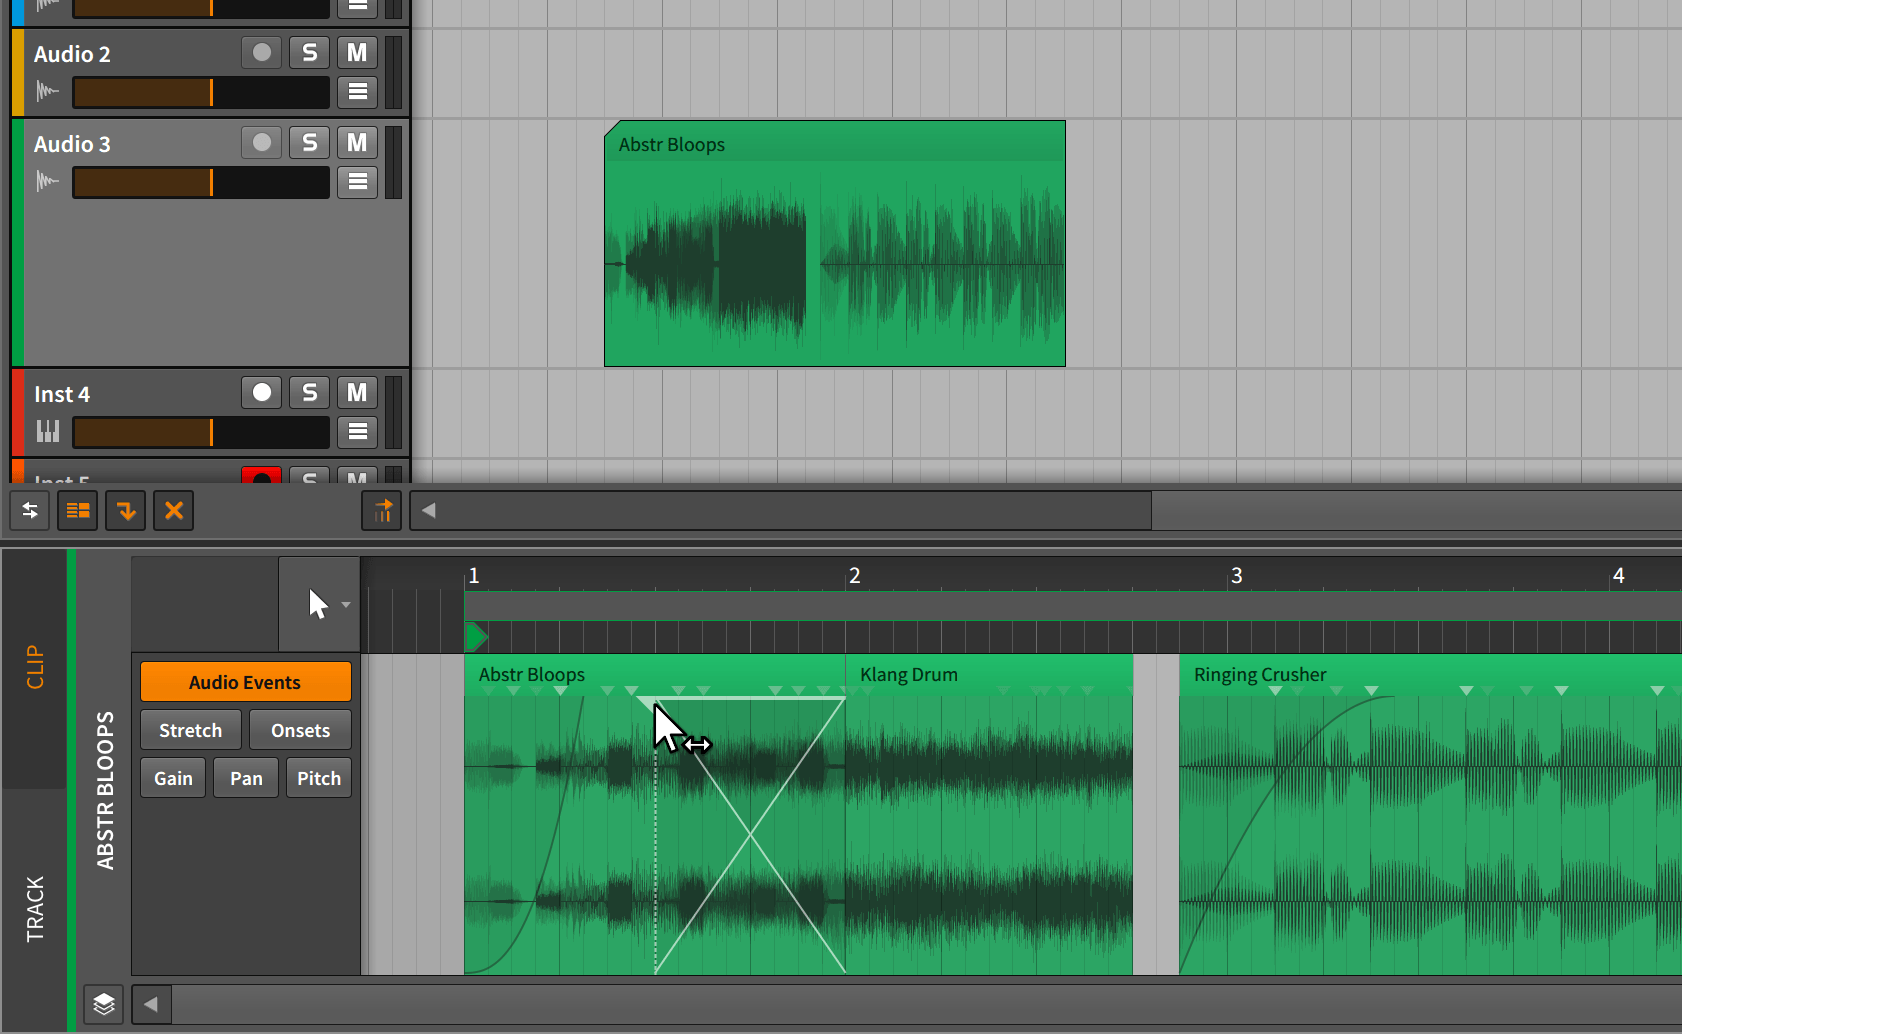
Here you can fade and crossfade Audio Events in the same fashion as Clips in the Arranger.
Tips!
All Fade properties are also available in the Inspector panel when a Clip is selected. Here you can edit the Clip's Fades numerically and toggle the slopes between normal and S‑shape.
Another way to toggle the slope shape is by holding the ALT key while clicking on a Fade or Crossfade.
Holding the CTRL key (CMD key on Mac) while clicking on a Fade resets its centre gain value to the default 0dB.
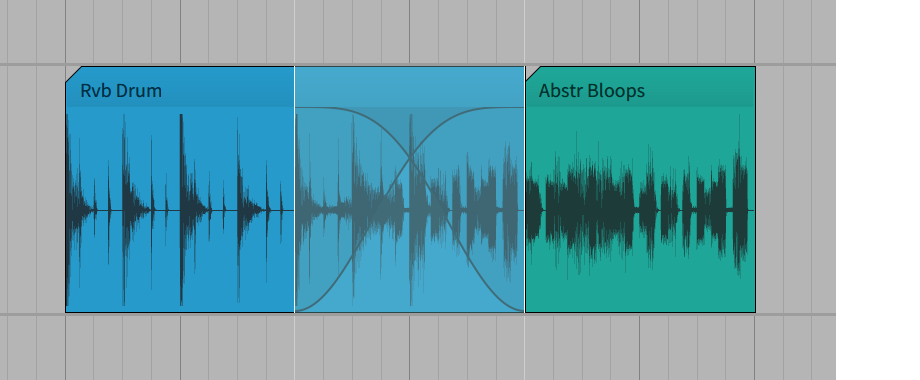
Another way to apply Fades is by marking a section with the Time Selection tool.
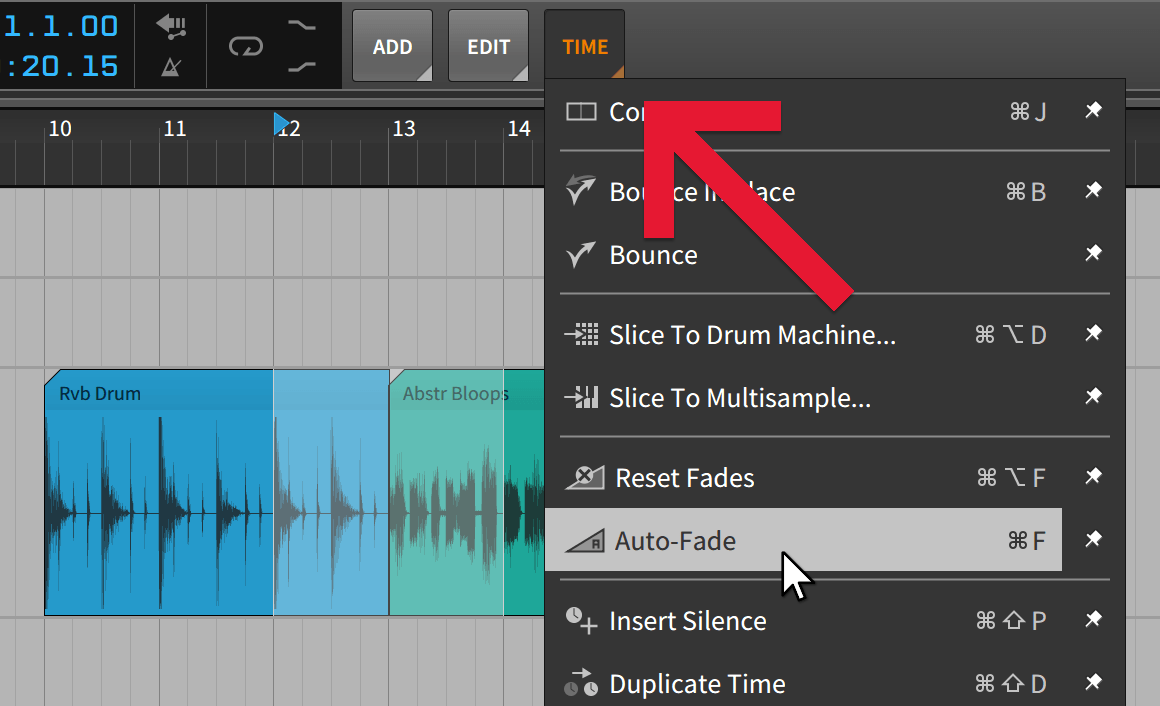
Then select the "Auto-Fade" function from the "Time" dropdown menu. As in all dropdown menus, you can also pin items to the Menu bar.
Boom!
Tags:Learn Bitwig Studio
Share this on: